Notions-Drye Goods Studio Diary

Thanks for checking in. I am a fiber artist. My current emphasis is on eco printing and other wildcraft with a touch of up-cycling thrown in. You can also catch up with me on Facebook at Drye Goods Studio.
Showing posts with label technique. Show all posts

Sunday, March 12, 2023

Tea Time

 "A simple cup of tea is far from a simple matter."

Mary Lou Heiss

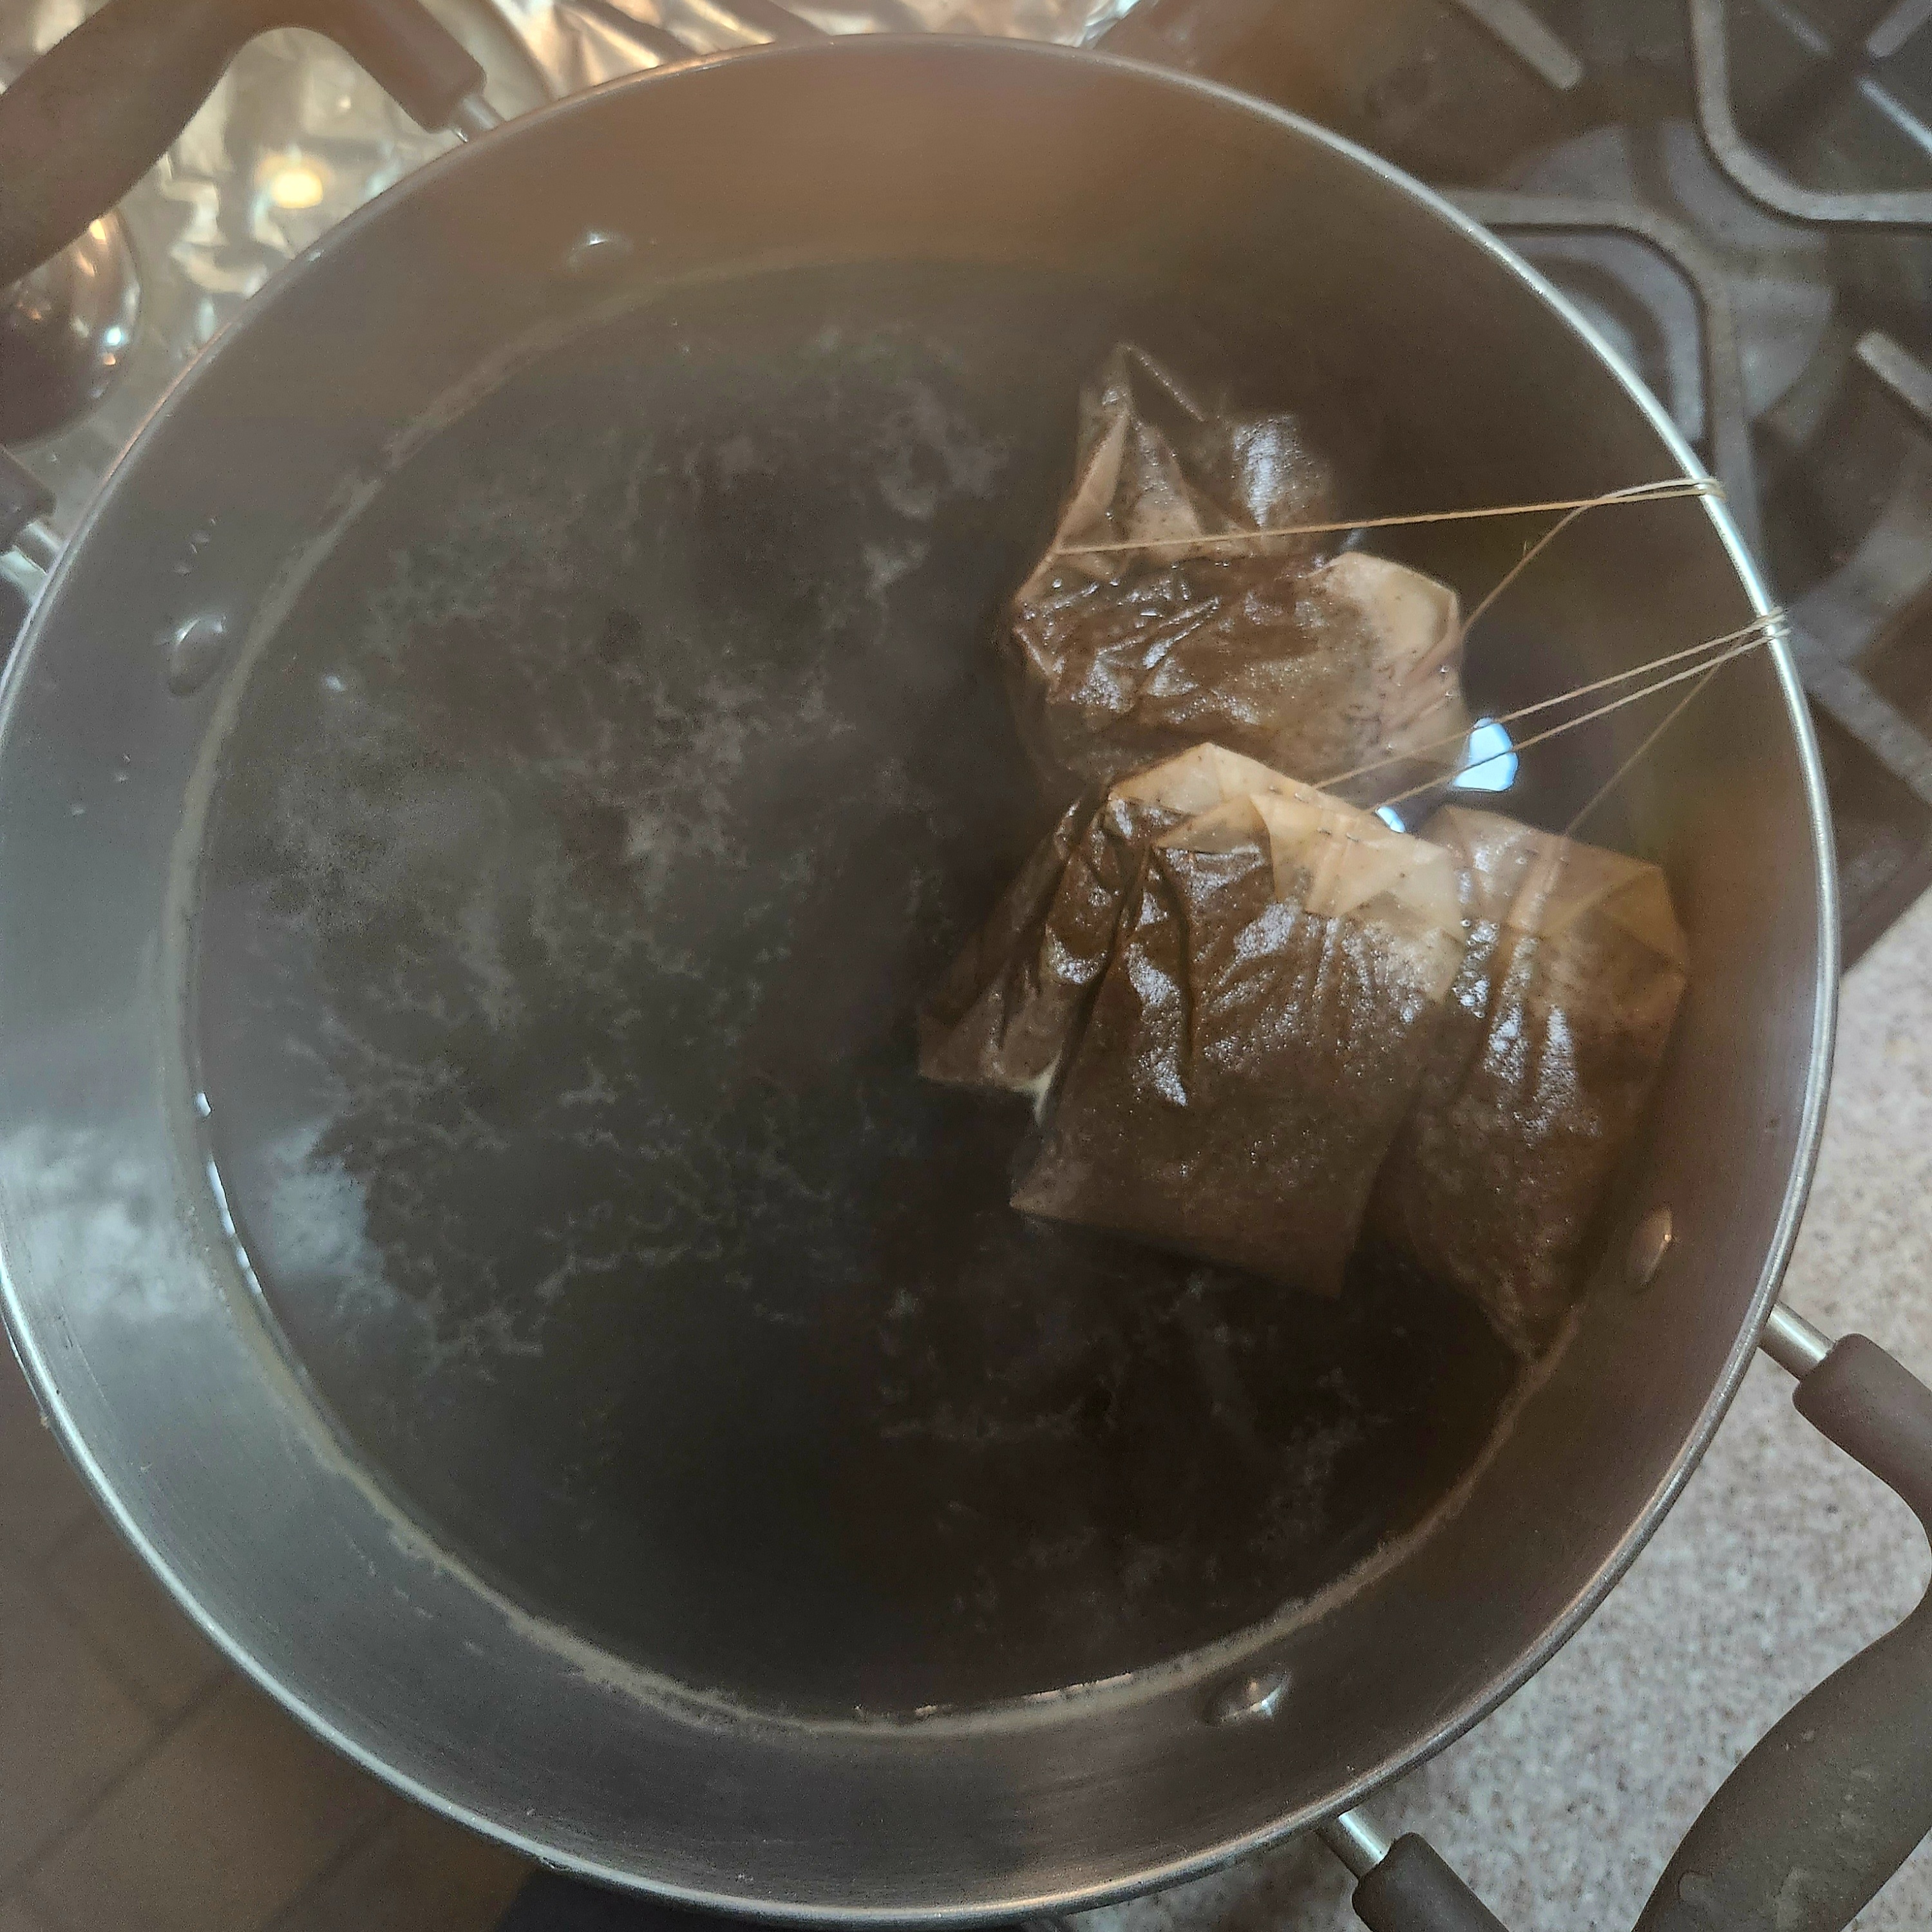
This turned into quite the project! I am still mulling over what exactly I will do with all this fabric, but in the meantime, here is what happened. As far as process goes, I let the various teas steep overnight and then used the liquid as a dye, vs. just dipping the fabric as one normally thinks of "tea dyeing". So I poured the liquid into a clean stainless steel pot, added enough water for the fabric to float freely and then simmered each one for about 30-40 minutes. All the silk broadcloth pieces for the herb teas were pretreated with alum. As you can see, the nettle did almost nothing, instead of green or yellow. This could be because it may not work as a dried plant, or it could be I didn't simmer it long enough.

These are the herbal teas, hibiscus, comfrey (after an iron dip), chamomile (the type for tea, not the dyer's chamomile, so the yellow was a nice surprise), St John's Wort, and the last was nettle. 

The picture above and the ones below are all with a very strong brew of plain old black tea that I steeped overnight and again used as dye, so they were simmered about 30-40 minutes. The pretreatment of alum didn't seem to make much of a difference color-wise, but may add to longevity. Since tea is high in tannins I am not sure it would make a difference one way or the other. The samples on the left of all these images are just as the silk broadcloth came out of the dye pot. The samples on the right are after a dip in iron water. I did this to give myself more color options, and just to see what would happen.


The fabric was rust treated with steel wool, so everywhere the tea interacted with the rust it turned black.

The fabric had rusted nails laid out on it first, and again, when the tea and rust meet, the rust turned black.

I am betwixt and between as to what to do with all this. I had better make up my mind soon as the pictures and info about the piece are due at the end of the month! I found it interesting that when I was just sitting there looking at the first results I could not see the herbal tea fabric being used with the black tea fabrics at all, but when I did the iron dip on the black tea fabrics (turning it gray) other possibilities emerged. This is kind of how my head works anyway, the process of doing things inspires me, I just wish I were a little speedier at it is all.

Saturday, February 11, 2023

A Spot of Tea

"There is something about the nature of tea that leads us into a world of quiet contemplation of life."

Lin Yutang, The Importance of Living 


I am participating in an exhibition in May that is all about tea. Today I started the process to dye fabrics for this piece having no idea what the final project will look like. I am generally inspired by materials, so I figured the way to get started, was, well, make the materials for the piece! The first thing to decide was should the work just involve only traditional black tea. Depending on the strength of the tea, how long you expose the fabric, or what mordants/adjuncts are used, the possibilities are probably endless. People make tea out of many different leaves and flowers not only for enjoyment, but medicinal use as well. I decided to look through my tea cabinet to see what the other options might be.

In the event I want to use other colors besides "just tea" I gathered up bagged and loose teas that are also used in natural dyeing. After some research I decided to let them steep overnight to enhance (hopefully) the intensity of the colors. From left to right: Chamomile, St John's Wort, Comfrey, Hibiscus, Nettle.  I am only going to be dyeing fat quarter size pieces of silk broadcloth, so this should be plenty.

I also brewed up a medium size stock pot of plain old, very strong, black tea. This first go around I will be using a half yard of silk broadcloth treated with alum. I may do some sort of resists, various adjuncts, and vary the exposure time to get multiple tones. I have another untreated half yard reserved for other possibilities. 


Monday, March 1, 2021

Seeing Red

 "If I could tell you about Red

I would sing to you of fire

Sweet like cherries

Burning like cinnamon

Smelling like a rose in the sun"

Dixie Dawn Miller Goode, Rainbows Around Us: A Celebration of Color


I started an experiment with Padauk saw dust my husband saved for me. After some digging around on the internet, I did find several sets of instructions, but not much on how permanent the final color will be. So we'll just have to see what happens.

Here is the sawdust.

This is the type of pigment that has to be soaked out in alcohol, so here is about a cup of sawdust soaking in about two cups of vodka. It was such a beautiful day today I had to run the jar outside to give you the full effect. Most instructions said to let it set for a week or more, so I will be getting some small pieces of silk ready to dye later this week.

Padauk (pterocarpus) is the bright red strip in this cutting board my husband made. The tree is native to the African continent and is also called mukwa or narra.  

I will have several experiments going while waiting for the local leaves to appear. Somebody gave me some alkanet, which I think I left in the cabinet after I discovered that it will pretty much fade with exposure to air, much more so with sun etc. But, impermanence being the way of all things I decided that it would be fun to play with, I have some older scarves of my own that might like to be purple! When and if they fade, maybe they will want to be some other color at that point. I also have a bag of avocado pits going in the freezer, I am never sure how many it takes, but I have some paper and lace just waiting to that lovely shade of pink avocado pits can produce.

Friday, January 1, 2021

New Year, New Day

 "Living in the past is depression, living in the future is anxiety."

Unknown


We have hit the gray and sometimes bleak part of winter here, so I decided to spend the week making a little sunshine. In the summer I pick Tansy flowers from along the river and hang them to dry for just such an occasion.

I put the dried flower heads in a pot of water to soak overnight, then simmered them for about 45 minutes to make the dye. The scent is lovely, like yarrow, sharp and calming at the same time.

This is right at the beginning, such a beautiful soft color! I simmered them for about an hour and then let them sit until evening before removing them from the dye bath.


The fabric in the background silk crepe de chine, the one swooshing across the middle is silk dupioni. These were scrappy type pieces of fabric that I had treated with alum last summer (I have no idea what I intended to do with them then) and they did have a bit of iron contamination as there are some spots here and there. No worries, I will either find something to do with them, or maybe, give them a bath in the iron pot and turn them olive green at a later date. Right now they are hanging in my studio so I can enjoy the color, which is about the color of the winter sun here when we get to see it.

At the moment, I am doing my best to live in the moment. Having too many expectations for the coming year could make it seem worse than it actually is. Looking back on the debacle of 2020, I can see where I did that to myself at times. I was just reading an article about people who are starting up whole new businesses during the pandemic, and I know several personally that started up businesses during the Great Recession that are still in business. While I have no interest in reinventing the wheel at this point, I am looking deeply (as I was right before the pandemic started) into the business side of my art, while still practicing art, no matter what type it is. I bought myself a little Christmas present, Shelley Rhodes book Sketchbook Explorations, and although I have never really kept sketchbooks decided it would be an interesting idea to mess around with while waiting for the snow to melt and spring to return. Only two days into it and I have had a bunch of thoughts about the art, that may or may not lead to other business ideas. But without the art, there is no business, so the thing to do is keep making more art and when the time is right (whenever in the world that might end up being) the business ideas tend to synthesize themselves.

If you can't seem to get into the "Happy New Year" mood, that may actually be a good thing for now. It may be your soul protecting you from either overthinking the past or the future; and thus causing you pain of one sort or another. About the only thing you have control over is today, so the things to do today are those that make tomorrow a better place, no matter what happens. 

Cheers, take care of yourself and stay safe.

Wednesday, September 2, 2020

Peeling Onions Part ll

 "Reality, it seems, is not a flat plane, but has as many veils as an onion has skins."

Johnny Rich, The Human Script

This is onion skin with no pre mordant laid out on silk dupioni. After laying out the onionskins and folding the fabric in thirds the long way, I put rusted nails about every 5 inches or so and then rolled the silk up jelly roll style. Then it was steamed for an hour and allowed to cool off. You can let it set longer for darker colors, but you run the risk of the rust "burning" the fabric. Everywhere the nails interact with onionskins, you end up with black stripes; almost an animal print!

Once the above procedure is done you can then dip the fabric in iron water-no heat applied in this case. It starts to change from orange to browns, greens and grays almost immediately, so keep an eye on it. I think this sample was about 30 minutes or so. You can either rinse it out at that point or let it dry on its own, keeping in mind it will continue to darken. Also remember that wet fabric appears about two shades darker than it will when it dries, so just gage from that how dark you want it to get.

Side by side-the tiger print and the jungle it lives in!

If you would like to see a real world application of this technique visit my page at the Pottery Place Plus Online Store.

Tuesday, August 11, 2020

Experiments with Indigo


I grew indigo this year and decided it was time do something with it. I used the recipe that is in Harvesting Color by Rebecca Burgess.


I planted it in big pots this year, about 4 or 5 plants to each pot. Since it does require a fair amount of water it was much easier to maintain it this time around. This is Japanese Indigo (polygonum tinctorium).


This method calls for cramming a pound's worth of leaves into a large jar. It does not need to be quite this fancy, but this was the biggest one I had that was clean. Indigo requires no mordant and from what I have read can be come displeased with residues etc.


You then put the jar of leaves and water into a big pot of steaming water. You don't want it to boil, thus the thermometer. The water in the jar is turning dark in this picture, the water in the pot is clear water. I thought this was a great way to do this as it makes it much less likely that the indigo will get too hot. The only downside to it is that it doesn't make a ton of dye, but there is still enough left to do some other small pieces. Once I got to the point where I alkalized, oxygenated and then reduced the dye, there wasn't time to take any pictures. But that is ok, I highly recommend getting the book (link above) and following it step by step.


This was the end result! I was so pleased with it as I haven't done much indigo and at different times it didn't seem like the process was going the way she said it would in the book. This is silk crepe de chine and I am just going to admire it for awhile before making it into anything.

Remember you can get handmade supplies in my Etsy Shop and there are scarves available at The Pottery Place Plus online store.


Wednesday, July 22, 2020

Huckleberries

"The time has come to reweave the future with different threads."
Yaakov Jerome Garb


I added some huckleberries to the mix after I had laid out the leaves. The post alum rinse described in the next two pictures will change the reddish color to a purply-blue. Post rinses will also change the colors of other plant materials as well, so expect some yellows and greens to appear.


This is what the scarves looked like after steaming. I allowed the rolls to sit until almost dry. The reddish color will not last on its own for very long, so a post alum rinse is in order. About a teaspoon of alum dissolved in a cup of warm water and then added to about a gallon and half of cool water is enough for two scarves. Submerge the scarves, let soak for several minutes, then remove, gently squeeze out excess water and hang to dry out of direct sunlight. After they are dry, wash in cold water by hand with a bit of shampoo and again, hang to dry out of direct sunlight.

I did these one at a time so I would be able to take a comparison picture. So the bottom is before the alum rinse and the top is after.

Friday, April 10, 2020

Rusty Objects as Mordant

Since my spring class ideas went down the tube thanks to COVID-19 social distancing, I decided to do a mini lesson in how to use a rusty object as a mordant. This is the way I do it. Where I got the idea was an article in a magazine on "rust dyeing". So, I followed those instructions and then did eco printing on top of it. There are probably other ways to accomplish the same thing, but this is the method I use and this is for silk.

1. Thoroughly wash the fabric first. This is referred to as scouring in dye world. For fine weave silks this it is basically just washing the fabric out in some sort of detergent or shampoo in warm (not hot) water. I usually fill a basin with warm water, dissolve the  shampoo in it, put the fabric in and let it soak until the water cools off or I suddenly remember that I left said basin in the laundry room days ago. Then I rinse it out. If the rinse water looks cloudy I may do the whole procedure again. On raw silk I will wash, soak, rinse several times as it is a much thicker fabric and it takes more effort to get out any silk starch. If you are upcycling silk clothing you will want to let the item have a long soak, and may wash it again just to make sure you are getting out as much of whatever laundry agents were used on it. You will never remove it all, but the more the better.

2. Fill a basin with water and a generous splash of white vinegar. Let it soak until thoroughly wetted out. With something like crepe de chine this is almost instantaneous, with something like raw silk it may take an hour or more. As you can see from the picture below, even after scouring the raw silk will still bead water, so it is important to let that water and vinegar get all the way into the fiber.


3. While you are waiting lay some plastic sheeting out on a flat surface that won't be disturbed for up to 24 hours. You will need enough to lay the fabric you have out and then fold the other half of the plastic over it.

4. Once the fabric is really wet lay it out on the plastic in such a way that you have the excess sheeting to fold over it to keep it wet. Place your rusty objects, in this case rusted nails, onto the fabric. You can be random, you can make patterns, whatever. Remember that you may not get the entire object to print, so be open minded. 


5. Using a spray bottle with 2 parts water and one part vinegar, spray the rusty nails until soaked. Cover with the remainder of the plastic sheet. You can keep using this plastic sheeting until it seems to get kind of "dusty" and then you should throw it away and start over. Rust dust is not good for the lungs.


6. Let set. As far as how long, this can depend on how warm it is in the place it is setting. The warmer it is the faster the rust drools off onto the fabric. So, for instance, in the winter I may leave things sit in the barn loft for about 24 hours, but in the summer I very often lay them out first thing in the morning and then make a note to myself to go check late afternoon, very often six hours will do it. Remember that rust is destructive to fabric (as is iron ferrous powder mordant, BTW) so you don't want to get carried away with this, you could end up with holes in the fabric! 

7. When you go to pick it up, it should look something like this. Set your nails in a container to get rusty all over again.


8. Dissolve about a tablespoon of plain salt (per yard of fabric) in some hot water and then add tepid water to fill the basin. Let the fabric soak in that solution until the water cools off. Then lightly rinse out. You can now eco print immediately or let it dry and store it for later use.

9. This is how my little sample turned out. I am still waiting for spring to arrive, so I used some Red Maple (Acer Rubrum) leaves that I had pressed and saved. Not the most exciting colors in the world, so there is also a detail picture of a scarf using the same technique.

This is the sample after opening, I haven't peeled the leaves off yet.


This is after final washing and ironing. Notice that everywhere the rust came into contact with plant material it turned black.


The coral color is eucalyptus and the green is arrowleaf balsamroot. While not as pronounced you can see little shots of black where the leaves and rust interacted. The eucalyptus is darker than it would have been without the rust. So, the rust does have some effect even if the plants aren't in direct contact with it.
So there you have it. Remember that I put new things in my Etsy shop almost every day, so check back often. I hope you are safe and well.

Thursday, October 31, 2019

Eco Printing on Gourds

"Inspiration exists, but it must find us working."
Pablo Picasso

Eco printing with walnut leaves on a gourd. I was messing around with eco printing on porcelain and then decided to see what would happen to a gourd, since I have a lot of them. I never had figured out exactly what I wanted to do with them-maybe this was the idea that was supposed to come along.

I soaked the gourds, the plant material, and the wrapping all in iron water and used leaves that usually work well with iron, kind of stacking the odds in my favor. Getting a gourd to actually soak is kind of trick-they want to bob around. As long as they don't have any cracks or holes they do not get mushy.

Trying to figure out how to keep the leaves attached until I could wrap the blanket around it. This worked pretty well.

Wrapped up and getting ready to steam. Needless to say the lid wouldn't go on the pan, so I made it a foil tent and steamed it for an hour. Since we have now officially run out of summer here (13 degrees last week-yikes!) gourds will have to wait until next year. I am getting some things together with the porcelain, pictures soon!
The holidays are coming! As promised I did put some scarves in the Etsy shop, along with many new buttons, pendants, and papers so be sure to check that out.

Friday, October 4, 2019

New Weed

And no, I am not trying to increase my SEO (search engine optimization) with that title-although it did cross my mind. Any-hoo, I thought I would show you my results using Watson's Willowherb.

This is what it looks like, sorry it is not the greatest picture, by the time I decided to try the plant it was at the end of its season. Those long curly things are the seed pods.

I decided to throw it in a stack of paper. I was alternating sheets soaked in iron with sheets soaked in alum. I do like the burgundy red with the mint green and I was really excited to see the wispy seed pods printed too.

Of course, I had to see what would happen on fabric so I went scrounging around in the weediest garden border on the north side of the yard and lucked out-there was some hiding behind the sour cherry tree! Since it worked really well with the iron/alum combo on paper I decided to do the same with fabric. This is silk crepe de chine pretreated with alum using an iron blanket.

And this is the iron blanket! I was so surprised this printed so well.
Be sure to check out my Etsy shop, there are lots of new things and I have been restocking the old. 

Monday, September 23, 2019

Surprises

"Our brightest blazes of gladness are commonly kindled by unexpected sparks."
Samuel Johnson


As it turns out, the gingko leaf actually does discharge, that is, bleach out color. I had 3 "bummer" scarves hanging around (as in, I opened up the roll and went "Bummer!") So I decided to give this technique a go. Although I would be the first to admit this is probably the worst example ever created, I am so jazzed that anything happened at all! Also beware of internet photos-this looks way better here than in real life; but it makes me want to run around dyeing fabric just to do it again and again-practice makes perfect! Or better than this anyway.

I will fiddle with it some more after The Little Spokane River Artist Studio Tour (do you like how I worked that in?). This Saturday September 28th, I will be at stop number 3, Jill Smith's studio, come see me! 10-5 rain or shine.

Friday, August 30, 2019

And Now We Wait

I taught a class last weekend and while I was gathering plant material I grabbed a couple of "experimental" ones. Meaning, either by some miracle I had never tried them, or, I did and couldn't remember whether they worked or not. I like to include an unknown as I think it gives students the "permission" to go out and take a chance on something. It is not the end of the world if it doesn't print; and then I remind them that just because it didn't work with the mordant we are using, or at the time of year the plant was picked doesn't mean that it wouldn't print under other circumstances.

We are living in a jungle of  flea bane (Conyza canadensis), also known as Horseweed as supposedly it is irritating to horses. There doesn't seem to be a consensus as to whether it actually repels fleas, but our dogs never had any!
Conyza canadensis, also known as flea bane or horseweed with antique tractor.
I simply love it when I find something that is everywhere, in the way, and generally making a nuisance of itself, prints. In this case it is a member of the sunflower family, so it does make sense that it printed yellow or green.

On paper. On the left the paper was soaked in alum water and the flea bane was soaked in iron water. On the right the paper was soaked in alum water and the plant material used as is.


Top photo silk crepe de chine pretreated with alum plant material used as picked. Middle photo silk crepe treated with alum, plant material soaked in iron water. Bottom photo silk twill soaked in iron water, plant material used as is. Be sure to click on the pictures to enlarge them in order to see the details.
   Since it is a member of the sunflower family and it "should" do this I have no reason to believe the paper would change much over time. Fabric can be a different ballgame so I will leave it hang on my studio closet doors until next spring to see what happens to it. Once the out of control grapevine has been put back in its place for the year that wall will get moderate morning sun through the windows until we really hit the depths of winter so that is a pretty good test on "wearability". I will wash it out then and see what it looks like.

Side by side comparison

Remember to take a look at my Etsy Shop, Facebook page and Instagram

Friday, February 22, 2019

Results of the Steamer Pot Picture

I posted this picture on Drye Goods Studio Facebook page the other day and it got some attention along with people asking to see results because of the foil liner. It functions as a barrier, but in a small way as a mordant blanket. I have done this before and have gotten zingier colors, but maybe that was because I was using fresh plant material, this was all done with dry leaves.


So here you go:

Vine Maple, the yellow is the "ghost" from the top of the leaf, the darker print is from the underside or veined side.


A side by side comparison of oak with and with foil barriers. The one on the left is without; the prints are a brown/plum and the background has more "noise" in it. The one on the right is a different shade of brown and the background is cleaner.

Acer Rubrum 

Dogwood
Not sure about the yellow and brown as a color combo, I may do something else with them while staring out the window watching the snow pile up.